Your first model
This walks through the whole loop once: make a model, build, paint, fix a mistake, and finalise. It takes about five minutes.
The numbers in the screenshots (①, ②, …) match the numbers in the text beside them.
1. Make a model
Section titled “1. Make a model”- Press N in the 3D Viewport to open the sidebar, then click the Voxel tab.
- Click Add Voxel Model ①. The New Model settings ② below it decide the size and starting shape.
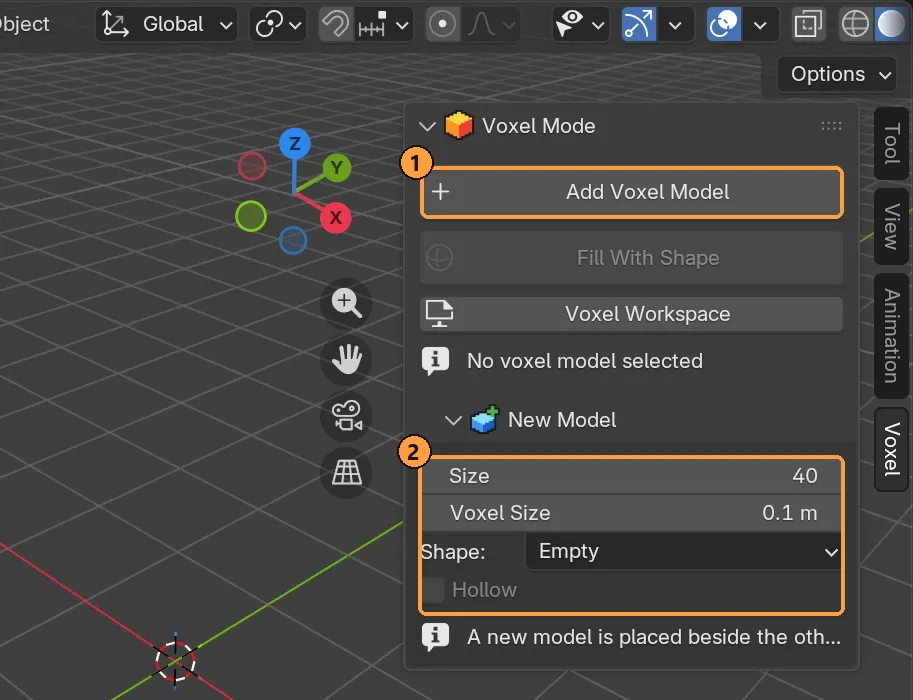
You get an empty 40 × 40 × 40 grid, and Blender switches straight into Edit Mode on it with Voxel Mode’s tools in the toolbar. (If you’d rather stay in Object Mode, turn off Edit New Models Straight Away in the preferences.)
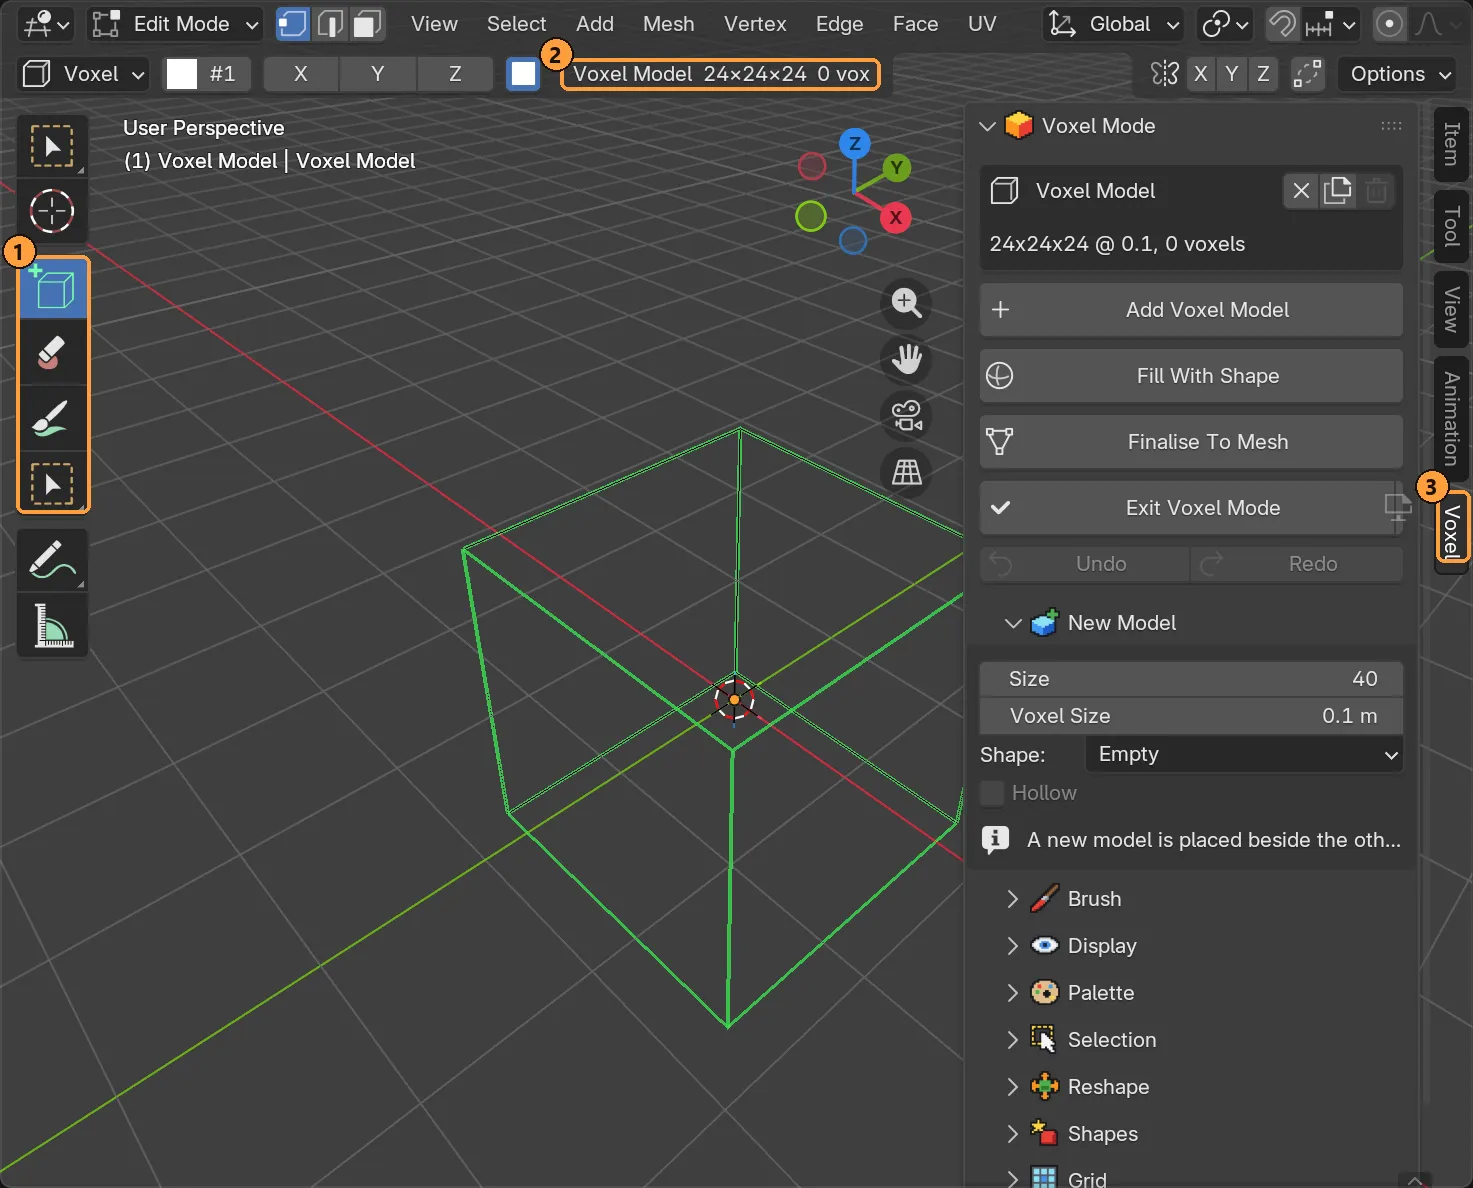
- ① The toolbar now holds the voxel tools: Attach, Erase, Paint and Select.
- ② The tool header shows the model’s name, its size and how many voxels it holds.
- ③ The Voxel tab of the sidebar.
The green box is the grid: everything you build lives inside it. You can change the size after the fact in the Adjust Last Operation panel (F9).
2. Build
Section titled “2. Build”The Attach tool is active. Its shortcut is D.
- Click on the floor of the grid to place a voxel.
- Click on a voxel’s face to place one on top of it.
- Drag to draw a trail of voxels.
Now switch brush shape with the number keys:
| Key | Brush | Try this |
|---|---|---|
| 1 | Voxel | One cube per click; drag for a trail |
| 2 | Face | Press on a face and drag outward: whole layers grow |
| 3 | Box | Drag out a rectangle; tap Z mid-drag and move up to give it height |
| 4 | Line | Drag a straight line; hold Shift to keep it on one axis |
| 5 | Shape | Stamps a library shape along the drag |
Make a box with 3: drag a 10 × 10 square on the floor, tap Z without letting go, move the mouse up 10 voxels and release.
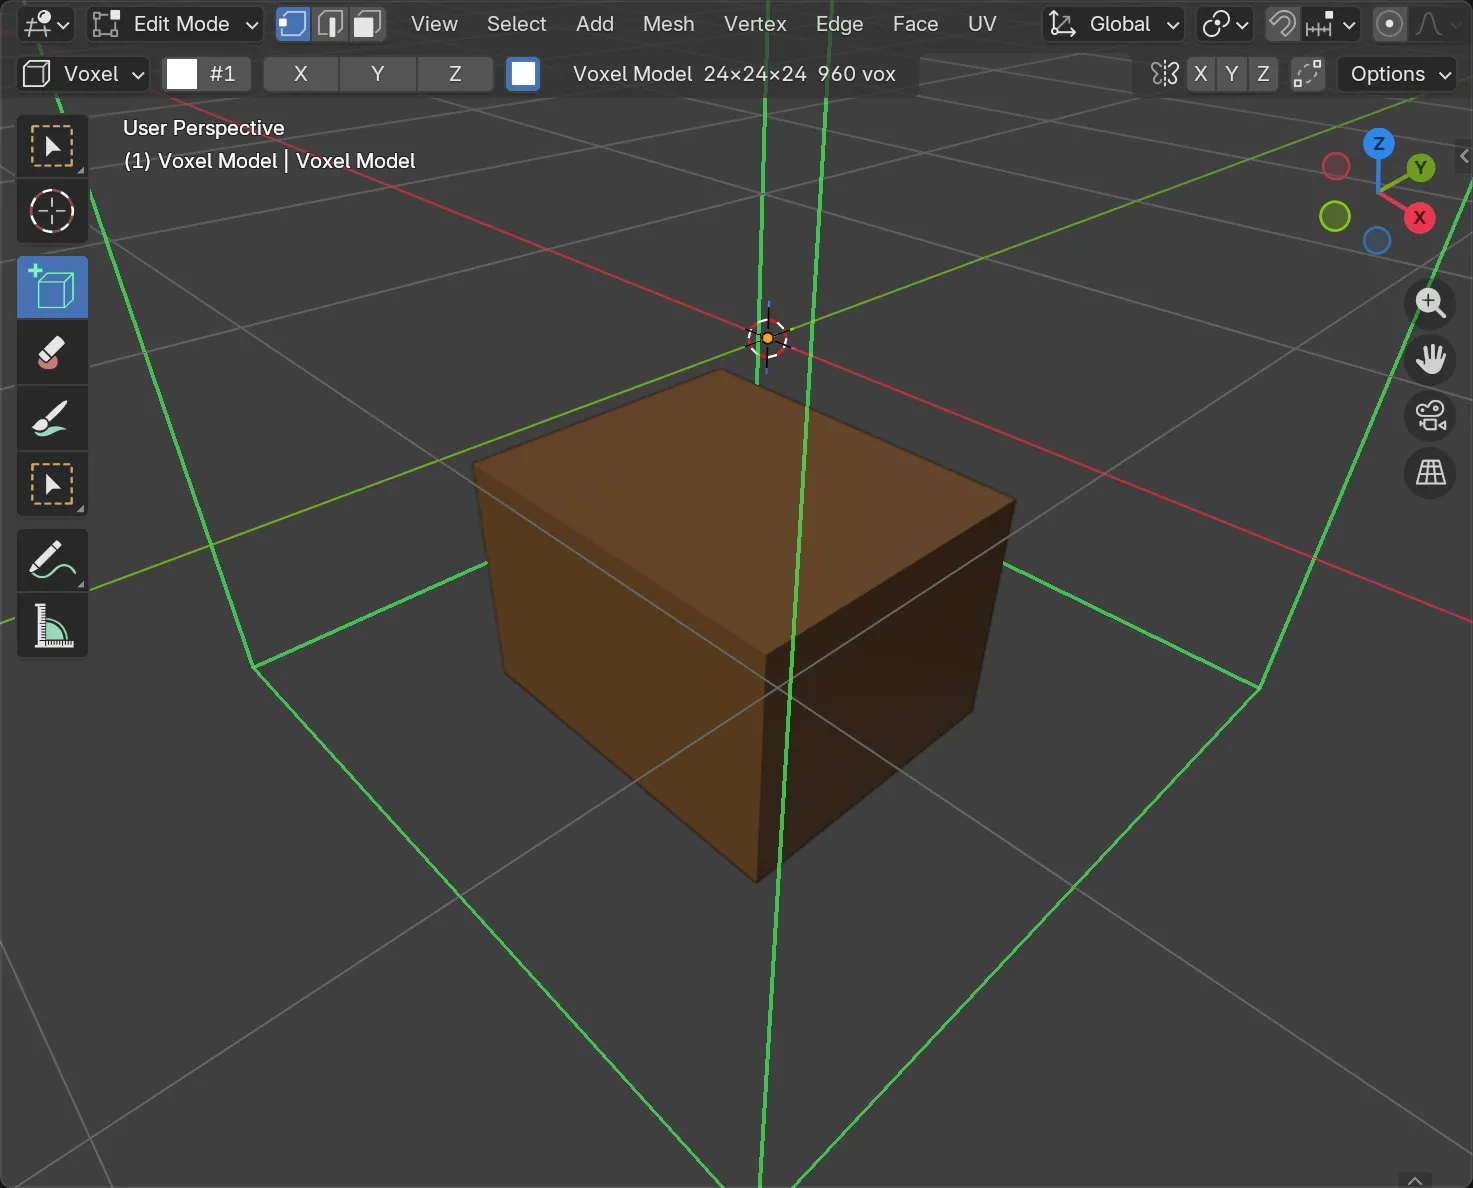
Then press 2 for Face and press on one side of the box. Drag outward and whole layers grow from that face; drag back past where you started and the brush carves layers off instead.
3. Erase
Section titled “3. Erase”- Hold Shift while clicking with Attach and it erases instead. The hover cube turns red first, so you can see what is about to go.
- Or press E for the Erase tool.
4. Paint
Section titled “4. Paint”- Press C. The palette opens under your mouse. Click a colour.
- Press R for the Paint tool and drag over the box.
- Hold Alt and click any voxel to pick up its colour, like an eyedropper.
On the Attach and Erase tools, Ctrl + click paints, so you don’t always need to switch tools.
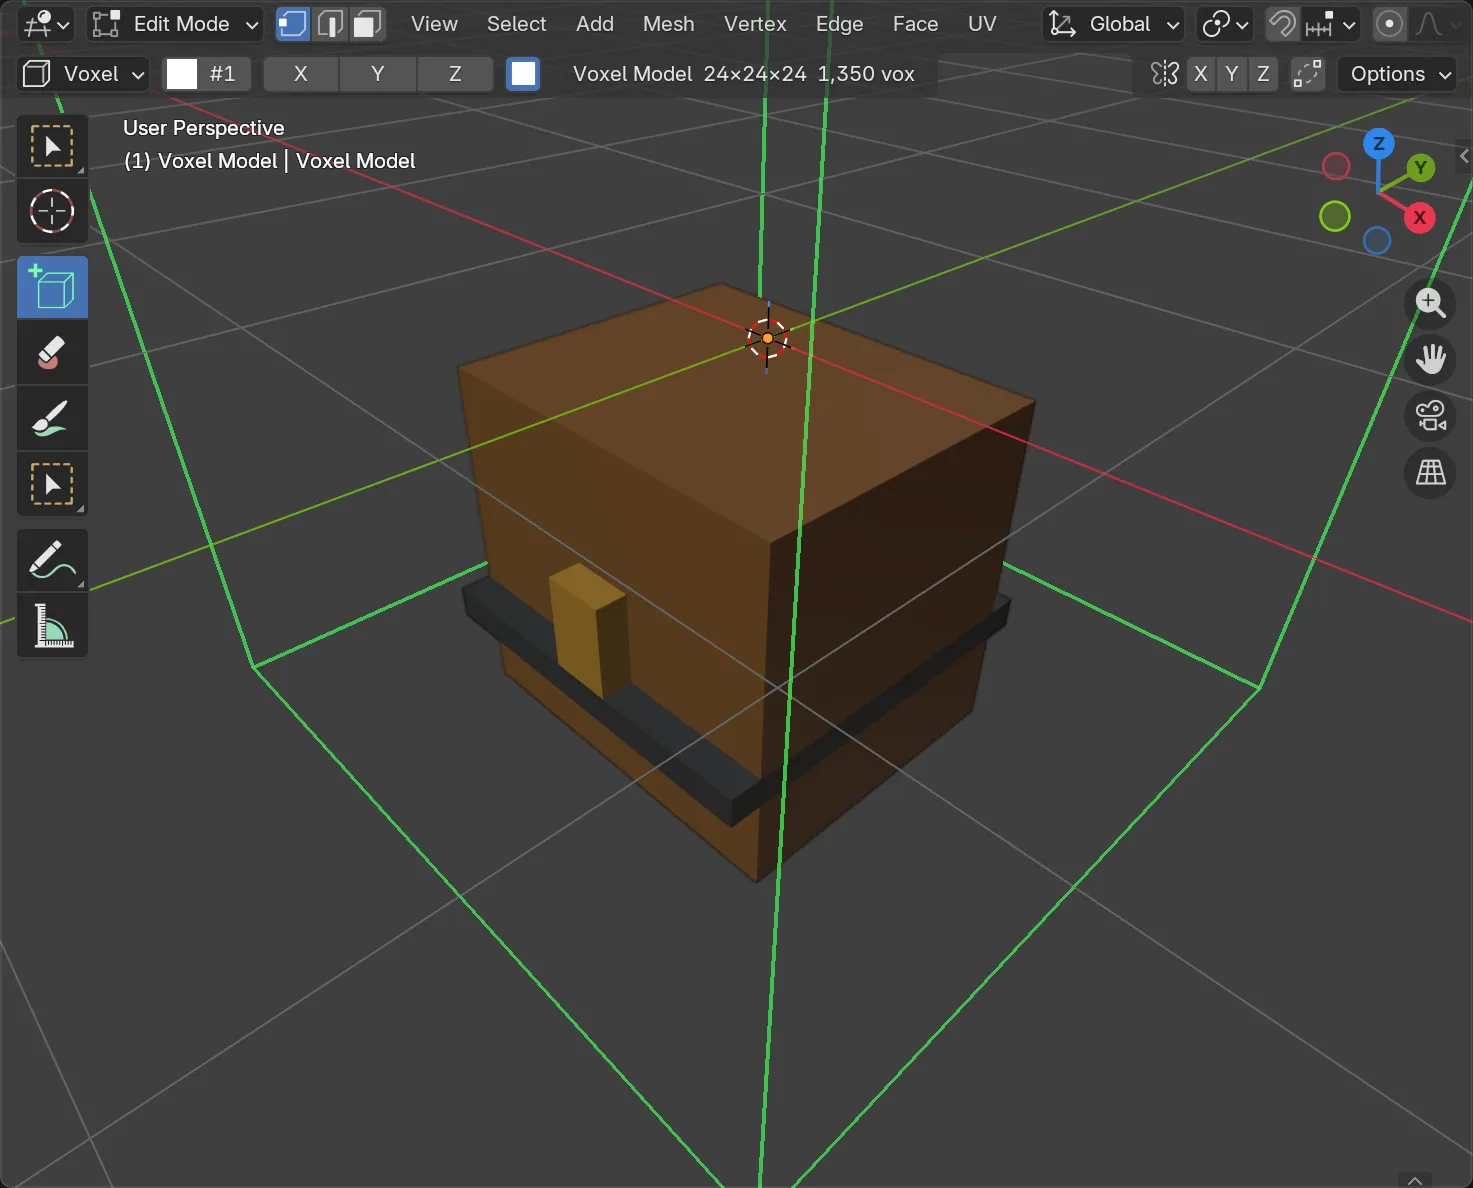
With a lid built on top using the Face brush, an iron band drawn with the Line brush, and a gold lock added voxel by voxel, the box becomes a chest:
5. Undo
Section titled “5. Undo”Ctrl + Z undoes the last stroke, and Ctrl + Shift + Z redoes it. A whole stroke, however long, is one step.
6. Leave, and come back
Section titled “6. Leave, and come back”Press Tab to go back to Object Mode. The model is now an ordinary object: move it with G, or duplicate it with Shift + D. Press S to make its grid bigger or smaller. Press Tab again to keep editing.
7. Finalise
Section titled “7. Finalise”When you want a normal mesh, for rendering, sculpting or exporting, click Finalise To Mesh in the Voxel tab. You get one clean mesh with your colours and materials on it. Keep Keep Voxel Model ticked and the editable version stays in the scene too.
To send it to a game engine instead, open the Export section and click Export File. See Export.
Where next
Section titled “Where next”- The interface has a tour of every panel.
- The Model a prop tutorial goes further: mirroring, selection, and placing library shapes.
- Keyboard shortcuts lists every key.