Characters, rigs and animation
The Character section of the Voxel tab turns a voxel model into an animated character. There are three templates:
| Template | For | Rig |
|---|---|---|
| Biped (Human) | People, orcs, robots, anything on two legs | 16 body parts, IK legs, T-pose |
| Quadruped | Horses, wolves, cows, anything on four legs | Body, neck, head, tail, four three-part legs, IK feet |
| Slime | Blobs and jellies | Fitted automatically; squash-and-stretch controls |
Nothing is weighted by hand. Every body part moves as a solid piece of voxels, which is how voxel characters are meant to move.
Quick start: a ready-made character
Section titled “Quick start: a ready-made character”- Open Voxel Library and search for warrior (or horse, wolf, cow…).
- Click Create Character under its thumbnail. It opens with its body parts already assigned.
- In Character, click Use Prepared Body Parts (③ below), check the bends, then Looks Good — Create Rig.
- Click Walk. Press Space to play.
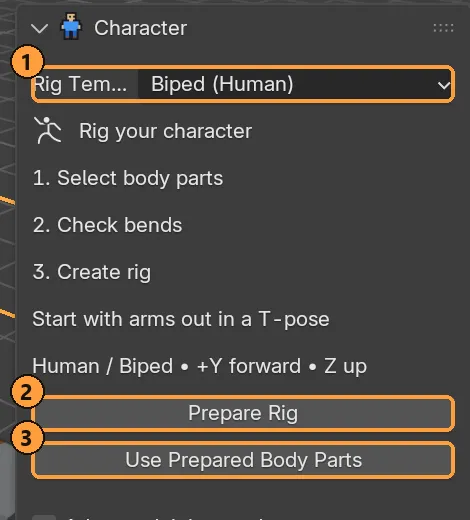
- Rig Template: Biped (Human), Quadruped or Slime.
- Prepare Rig starts the wizard for your own model.
- Use Prepared Body Parts skips it for a library character.
Library figures with a Create Character button include the Warrior and Warrior 64 (the same height at half-size voxels), and the horse, wolf, fox, deer, pig, cow, goat, boar, donkey, sheep and mammoth.
Rigging your own biped
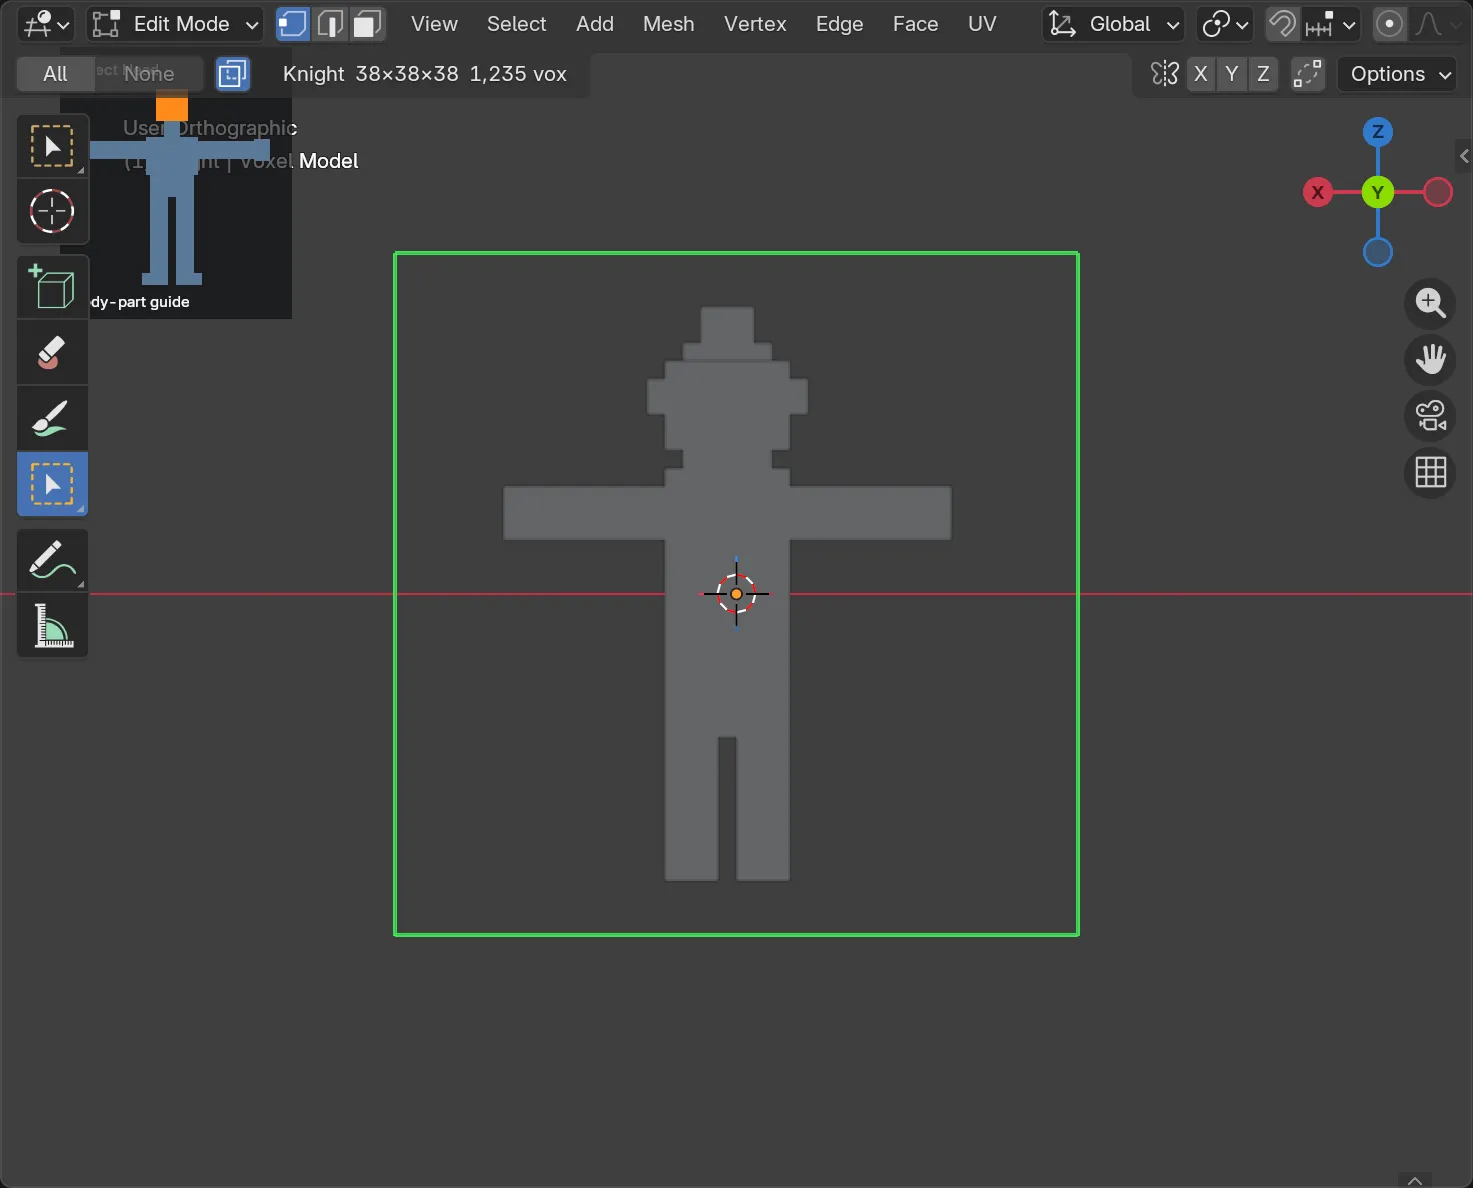
Section titled “Rigging your own biped”Model the character in a T-pose: arms out sideways, legs apart, facing +Y, with Z up. Then select the model and open Character.
-
Rig Template: Biped (Human), then Prepare Rig.
-
The panel asks for one part at a time, starting with Select the head voxels, and a diagram in the viewport highlights where it is.
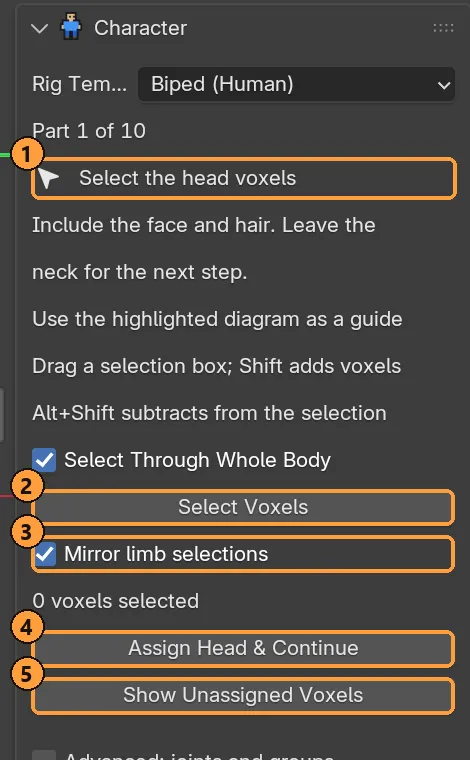
① The part being asked for. ② Select Voxels. ③ Mirror limb selections. ④ Assign … & Continue. ⑤ Show Unassigned Voxels. Drag a box with Select Voxels; Shift adds, Alt + Shift subtracts. Select Through Whole Body takes voxels hidden behind the surface too.
-
Click Assign Head & Continue, and so on for each part. Back: Correct Previous Part re-selects the last assignment so you can fix it.
-
Mirror limb selections assigns both sides of an arm or leg from one. If the two sides differ, it changes nothing and tells you how to assign them separately.
-
The parts are: head, neck, chest, waist/hips, and left and right upper arm, forearm, hand, thigh, lower leg and foot. Every voxel needs a part. Show Unassigned Voxels finds the ones you missed, and Give Leftovers to Nearest Part assigns them for you.
-
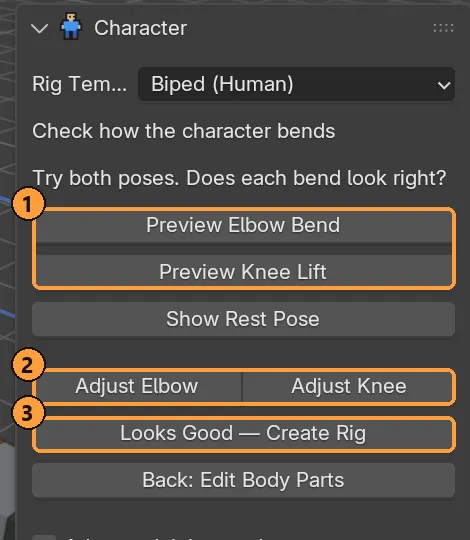
The joints are then fitted automatically. Click Preview Elbow Bend and Preview Knee Lift ①. These use a temporary rig and change nothing.
-
If a bend is in the wrong place, click Adjust Elbow or Adjust Knee ②, then Drag Bend Point. Enter finishes and Esc puts it back.
-
Looks Good — Create Rig ③.
Your progress through these steps is saved with the file.
Rigging your own quadruped
Section titled “Rigging your own quadruped”Any facing works: the wizard turns the model for you.
-
Rig Template: Quadruped, then Prepare Rig.
-
Face it forward: use Turn Left, Turn Around or Turn Right ② until the head points along the arrow, then Head Faces the Arrow — Continue ③.
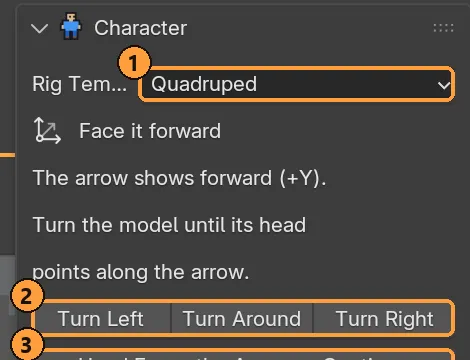
-
For each part a suggestion is already selected. Adjust it if needed and assign it. Optional parts such as the tail have Skip: No Tail.
-
Check the bends with Preview Leg Lift and Preview Head Down; adjust with Adjust Knee or Adjust Neck.
-
Looks Good — Create Rig.
Mirroring on animals only adds the reflection and never wipes the far side, so saddles and panniers that differ left to right survive.
Slimes
Section titled “Slimes”Rig Template: Slime fits the rig automatically. Three controls pose it:
- Top: stretch or lean.
- Body: wobble and bulge.
- Root: move the whole creature.
Edit Voxel Model goes back to painting the slime. A repaint updates the rig straight away; a change of shape needs Rebuild Slime Rig, which keeps your previous rig and its animations.
Sample animations
Section titled “Sample animations”Every sample is a normal, editable Blender Action keyed pose-to-pose with only a few keys per curve, so you can retime it and tweak the curves in the Dope Sheet and Graph Editor. Creating a sample never overwrites an animation you already have.
The Character panel has a quick row of the most common clips ①. More Animations ② lists the rest.
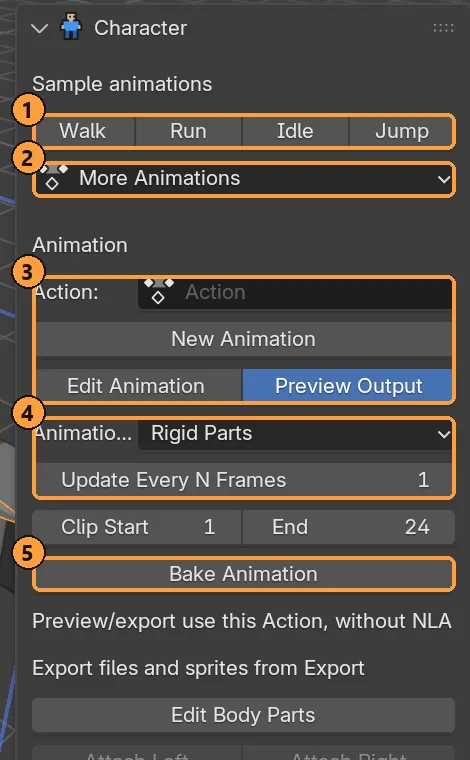
③ The Action and the buttons to make and edit your own. ④ Animation Output and Update Every N Frames. ⑤ Bake Animation.
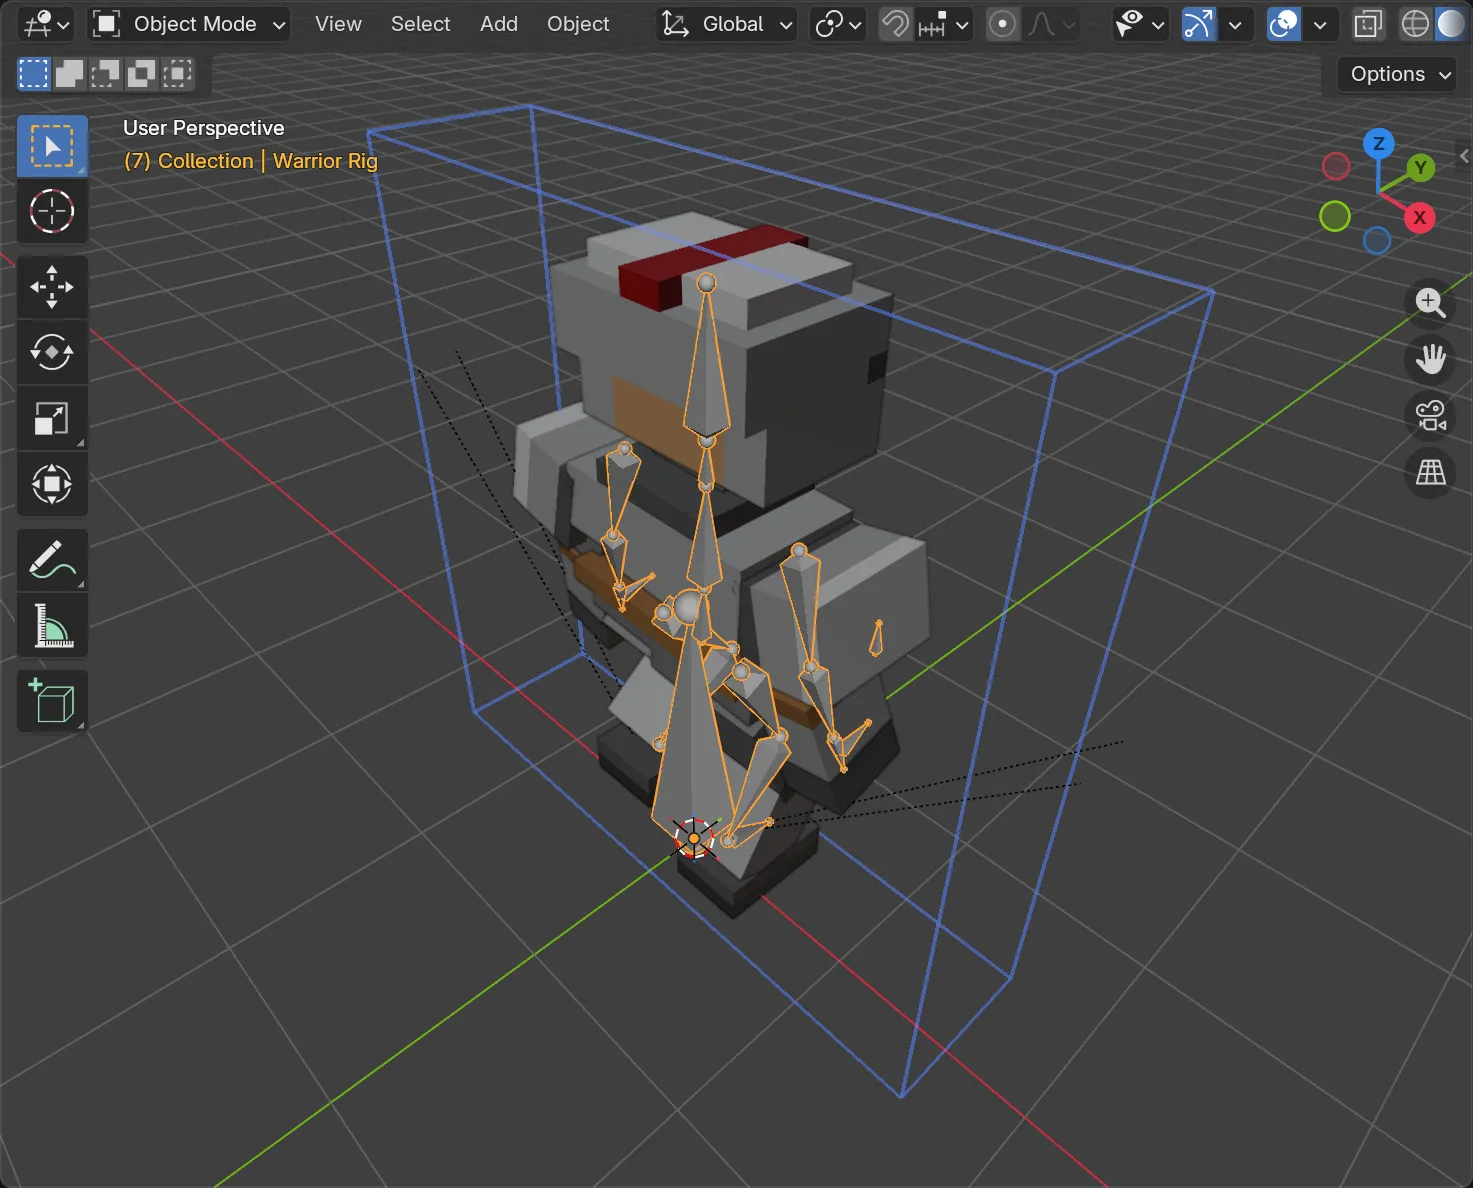
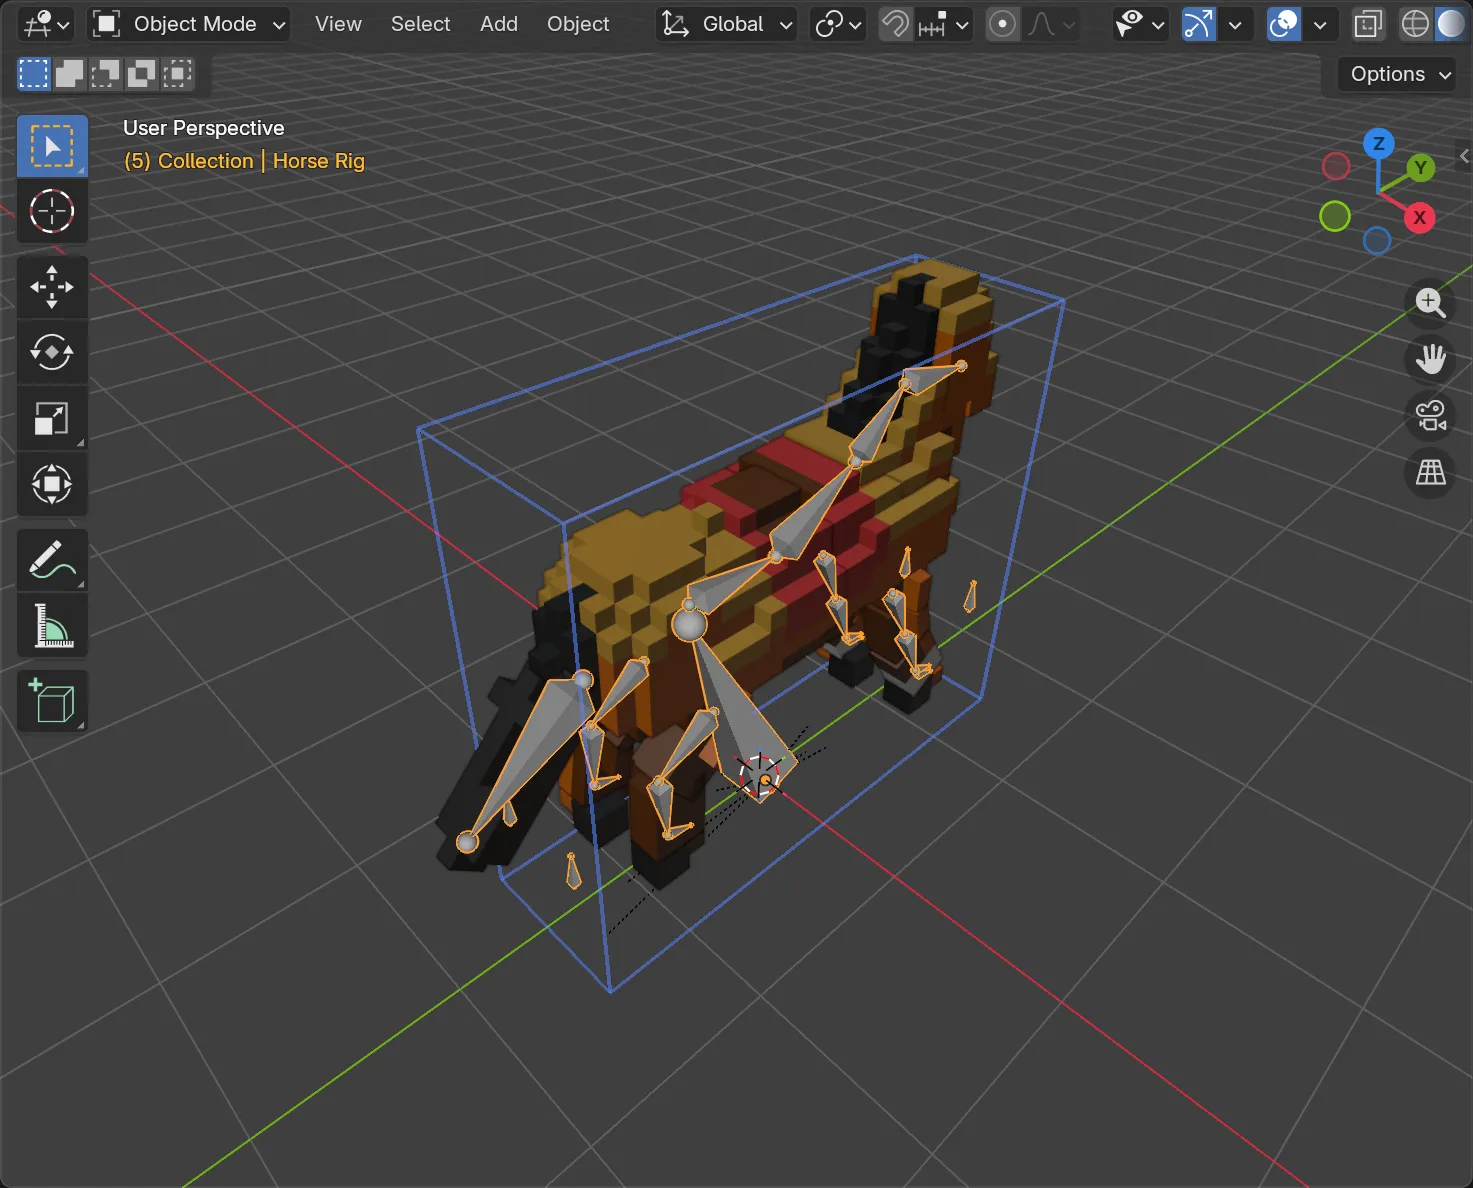
| Rig | Clips |
|---|---|
| Biped (22) | Walk, Run, Sprint, Strafe Left, Strafe Right, Walk Backward, Sneak, Jump · Hit Front, Hit Back, Hit Left, Hit Right, Punch, Overhead Smash, Kick, Block, Death · Idle, Crouch Idle, Roar, Victory, Wave |
| Quadruped (14) | Walk, Trot, Gallop, Jump, Idle, Graze, Sit, Lie Down, Howl, Bite, Rear Up, Buck, Hit, Death |
| Slime (10) | Hop, Lunge Attack, Hit, Melt, Spawn, Idle, Look Around, Happy, Dizzy, Wobble |
Loops end on their first pose, with a Cycles modifier so they repeat cleanly.
Your own animations
Section titled “Your own animations”In Character ▸ Animation:
| Control | Does |
|---|---|
| Action | Which animation the character shows and exports |
| New Animation | Starts a new, empty Action |
| Edit Animation | Opens the rig in Pose Mode to key it normally |
| Preview Output | Shows the voxel result of the Action |
| Clip Start / End | The frame range used for preview and export. A sample sets its own. |
Use Pose Mode, the Dope Sheet, the Graph Editor and the NLA exactly as you would on any Blender rig. Preview and export use the selected Action only, not NLA blending.
Output: how the voxels move
Section titled “Output: how the voxels move”| Animation Output | Looks like | Good for |
|---|---|---|
| Rigid Parts (default for bipeds and animals) | Each body part turns intact, like an action figure | Game export (FBX/glTF), clean silhouettes |
| Strict Grid | The whole character is re-voxelised onto one fixed world grid every frame, so it always looks like axis-aligned cubes | Sprites, and renders where voxels must never tilt |
| Skin (slimes) | Squash and stretch | Slime export |
Voxel Size (Strict Grid only) sets the cell size. Smaller is more detailed and slower.
Update Every N Frames holds each pose for N frames, giving the choppy stop-motion look of classic sprite games. It never changes your keys.
Bake Animation caches every frame of the clip, so playback and export don’t recompute. Save the file to keep the bake.
After the rig is built
Section titled “After the rig is built”- Edit Body Parts reopens the wizard with the current assignments. Creating the rig again keeps the old rig and its Actions. Existing Actions are not retargeted to changed proportions.
- Attach Left / Attach Right parents equipment (a sword, a shield) to a hand’s grip bone. The equipment must be its own voxel model. In Object Mode, select it and the rig, then click the button. Adjust the equipment’s transform to set the grip.
- Clicking any visible part of the character selects the rig, so the Action Editor always talks to the right object.
- Deleting the rig removes the whole character’s generated parts. Your voxel model and your Actions are kept.
The model you rigged stays an editable voxel model. The visible character is generated from it.
When the rig will not build
Section titled “When the rig will not build”See Troubleshooting for the common cases: the “Rest pose changed near Thigh” message, voxels left unassigned, and parts that cross the centre line.